
1. Understanding Django Apps
In the Django framework, a Django app (short for "application") is a self-contained module or component that adds a specific functionality to a Django project. An app is essentially a directory that consists of Python modules, templates, static files, and other resources working together to implement a distinct feature or a set of features.
A typical Django app comprises several key components:
- Models: Models define the structure of data and represent database tables. They are defined as Python classes inheriting from Django's models.Model class. Models determine the fields, relationships, and behaviors of the data.
- Views: Views handle the logic for processing HTTP requests and generating responses. They can be Python functions or classes that receive requests, interact with models or perform other operations, and ultimately return responses, usually in the form of HTML pages.
- Templates: Templates are HTML files that define the presentation and structure of the generated web pages. They have the ability to incorporate placeholders and template tags, allowing dynamic display of data passed from views.
- URLs: URLs (Uniform Resource Locators) define the URL patterns and map them to specific views within the app. They determine which view is called for a particular URL.
- Static Files: Static files encompass CSS stylesheets, JavaScript files, images, and other assets utilized by the app. These files are served directly by the web server and are not processed by Django.
- Forms: Forms are employed to handle user input, validate data, and interact with models. Django offers form handling functionality to simplify the creation and processing of forms.
- Admin: Django's admin interface provides a web-based administrative interface for effortless management and manipulation of an app's data. This interface is automatically generated based on the app's models and can be customized to meet specific requirements.
Django apps are meticulously designed to be modular, reusable, and pluggable. They facilitate code organization, separation of concerns, and maintainability. In a Django project, multiple apps can be created, with each app responsible for a distinct feature or aspect of the overall application. Django offers a range of tools and conventions to seamlessly manage and integrate apps into a project.
2. Creating a Django App
In this section, we will explore the steps to create a Django application named "myapp" within a Django project named "mysite". Follow the instructions below:
- Open your terminal or command prompt and navigate to the desired directory where you want to create your Django project.
- Create a new Django project called "mysite" by executing the following command:
django-admin startproject mysite - Change into the project directory by running the following command:
cd mysite - Create a new Django app within the project by executing:
python manage.py startapp myapp
Once you run the above command, a new directory named "myapp" will be generated. This directory contains various files and folders, including models.py, views.py, urls.py, and a templates folder.
To define your app's models, open the models.py file inside the "myapp" directory. Within this file, create Python classes that inherit from models.Model. Specify the necessary fields, relationships, and additional methods required for your app's data. (Further details on this will be covered in subsequent tutorials.)
Next, implement the logic for your app's views by opening the views.py file inside the "myapp" directory. Define Python functions or classes that handle HTTP requests and generate responses. These views can interact with models and perform other operations as needed.
By following these steps, you can successfully create a Django app named "myapp" within your Django project "mysite." This app can then be further developed and customized to add specific functionality to your project.
Free Research Preview. ChatGPT may produce inaccurate information about people, places, or facts.
To use your newly created app, you need to add it to the project's settings. Open the settings.py file inside the "mysite" directory, locate the INSTALLED_APPS list, and add the name of your app, which is "myapp", to the list:
INSTALLED_APPS = [
    'myapp.apps.Myapp.Config',
    "django.contrib.admin",
    "django.contrib.auth",
    "django.contrib.contenttypes",
    "django.contrib.sessions",
    "django.contrib.messages",
    "django.contrib.staticfiles",
]
3. Hierarchical structure of django app
To get an idea about the structure of a django app, here's a hierarchical structure of a Django project called "mysite" with a Django app called "myapp":
mysite/
├── mysite/
│   ├── __init__.py
│   ├── settings.py
│   ├── urls.py
│   └── wsgi.py
├── myapp/
│   ├── migrations/
│   │   └── __init__.py
│   ├── templates/
│   │   └── myapp/
│   ├── __init__.py
│   ├── admin.py
│   ├── apps.py
│   ├── models.py
│   ├── tests.py
│   └── views.py
└── manage.py
Explanation of the directory structure:
- The outer "mysite" directory: is the root directory of the Django project.
- The inner "mysite" directory: inside the "mysite" directory. This inner directory contains the project-level settings, URLs, and other project-related files.
- The "myapp" directory: is created within the project and represents the Django app named "myapp".
- The "migrations" directory: inside the "myapp" directory, which contains database migration files generated by Django for managing database schema changes.
- The "templates" directory: within the "myapp" directory is where you can store HTML templates specific to the "myapp" app.
- The "init.py" files: are required to treat the directories as Python packages.
- The "admin.py" file: is used to customize the Django admin interface for the "myapp" app.
- The "apps.py" file: holds the configuration for the "myapp" app.
- The "models.py" file: is where you define the models (database tables) for the "myapp" app.
- The "tests.py" file: is for writing tests specific to the "myapp" app.
- The "views.py" file: contains the views (functions or classes) responsible for handling HTTP requests and generating responses for the "myapp" app.
- The "manage.py" file: which we have already talked about, is the Django project management script.
This hierarchical structure illustrates the typical layout of a Django project with an app. It allows for modular development and organization of code, separating the project-level components from the app-specific components.
4. Settings app the url of myapp
4.1 Define the 'myapp' view
In order to be able to display our django application 'myapp', we must first define the view of the application by editing the file: myapp/views.py. We will add to the latter a function that will generate the view of the application 'myapp':
# myapp/views.py
from django.shortcuts import render
from django.http import HttpResponse

# function that generates the application view
def myapp_home(request):
    return HttpResponse("Welcome to myapp!")
4.2 Set up the url for "myapp"
To set up the URL for our "myapp" app within our Django project, we need to follow these steps:
- Within the "myapp" directory, create a new file called urls.py if it doesn't already exist.
- Open the newly created urls.py file within the "myapp" directory.
- Define the URL patterns specific to "myapp" app within the urls.py file. Here's an example to get you started:
# myapp/urls.py
from django.urls import path
from . import views

urlpatterns = [
    path('', views.myapp_home, name='home'),
    # Add more URL patterns as needed
]
4.3 Declaration of the "myapp/urls.py" file at the "mysite/urls.py" level:
we must at first, include function from the django.urls module by adding the following import statement at the top of the mysite/urls.py file:
from django.urls import include
Add a new URL pattern for "myapp" app by including the URL patterns:
path('myapp/', include('myapp.urls')),
This line defines a URL pattern that maps any URL starting with "myapp/" to be handled by the URL patterns defined in our "myapp" app's urls.py file.
Finally, here is the code of mysite/urls
# mysite/urls.py
from django.contrib import admin
from django.urls import path, include

urlpatterns = [
    path("admin/", admin.site.urls),
    path('myapp/' , include('myapp.urls'),
]
5. Launch myapp in the browser
To launch "myapp" in the browser, we need to start the Django development server. Here's how you can do it:
- Open your terminal or command prompt.
- Navigate to the root directory of your Django project (the directory containing the manage.py file).
- Start the development server by running the following command:
python manage.py runserver
- After executing the command, you should see output similar to the following:
- Starting development server at http://127.0.0.1:8000/
- Quit the server with CTRL-BREAK.
Now, when you run your Django development server and navigate to the URL "myapp/", it will be handled by the URL patterns defined in your "myapp" app's urls.py file, directing the request to the specified view function.
Open your web browser and enter the following URL: http://127.0.0.1:8000/myapp/
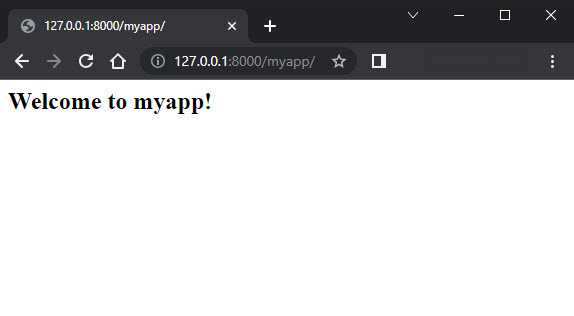
This URL represents the local development server running on your machine and accessing the "myapp" app.
We should now be able to see our "myapp" running in the browser. If we have defined a view function like myapp_home() in our "myapp" app's views.py file and configured the URL pattern correctly, the response from that view function will be displayed in the browser.