1 - About Generic Views (Class Based Views)
Django adopt the DRY philosophy and so is designed to have to write only the minimum , so the framework includes a system of generic views, which saves the developer from having to write simple and identical functions, saving us time and lines of codes. Since version 1.3 of Django, views are based on classes. These classes are grouped by functionality. To process forms, the following views are found in django.views.generic.edit: FormView, CreateView, UpdateView and DeleteView. In order to keep it simple, we will treat this tutorial on an example that we have already covered: Student management system.
2 - Preparing the system
2.1 - Creating a django project and django app studentApp
To start we must proceding by:
1 - creating of a new project called mysite
2 - migration and creation of a super user account
3 - creating of a new app called studentApp
Next, let's register our studentsApp application at the settings.py file:
INSTALLED_APPS = [
    'studentApp.apps.AccountsConfig',
    'django.contrib.admin',
    'django.contrib.auth',
    'django.contrib.contenttypes',
    'django.contrib.sessions',
    'django.contrib.messages',
    'django.contrib.staticfiles',
]
2.2 - Creating a model of studentsApp
# studentApp/models.py
from django.db import models
class Student(models.Model):
    name        = models.CharField(max_length=25)
    email       = models.EmailField(max_length=40)
    phone    = models.IntegerField(max_length=40)
    section      = models.CharField(max_length=25)
    photo = models.FileField(upload_to='photos')
Now we have to perform the necessary migrations:
python manage.py makemigrations studentAppand then :
python manage.py migrateNow let's configure the media and static files in
file by adding the following code:
STATIC_URL = '/static/'

STATICFILES_DIRS = [
    os.path.join (BASE_DIR, 'static/'),
]

MEDIA_ROOT = os.path.join(BASE_DIR, 'media')
MEDIA_URL = '/media/'
3 - First Use of Generic Views Using TemplateView
All generic view classes are located in
. A first type of generic view is
. Typically,
allows, as its name suggests, to create a view that will take care of rendering a template. As said before, let's create a class inheriting from
, and overload its attributes: As an example, we will display the start page of the mysite project using the
class. So let's create a
file within our mysite project and insert the following code:
# mysite/views.py
from django.views.generic import TemplateView

class homeView(TemplateView):
   template_name = "index.html"  # path to the template to display
Full code of
file
from django.contrib import admin
from django.urls import path, include
from django.conf.urls.static import static
from . import settings
from . views import homeView

urlpatterns = [
    path('admin/', admin.site.urls),
    path('' , homeView.as_view()),
    path('' , include('studentApp.urls')),
]+static(settings.MEDIA_URL, document_root=settings.MEDIA_ROOT)
Next, let's create the template file
targeted by the
class:
<!DOCTYPE html>
<html lang="en">
<head>
    <meta charset="UTF-8">
    <title>Title</title>
</head>
<body>
<h2> Home Page !</h2>
</body>
</html>
Then add the following code to the
file
path('' , homeView.as_view()),Note
Note that there are two ways to use generic views. the second method consists of directly instantiating the
class in the
file, passing it our template_name as an argument:
urlpatterns = [
    path('', TemplateView.as_view(template_name='index.html')),
]
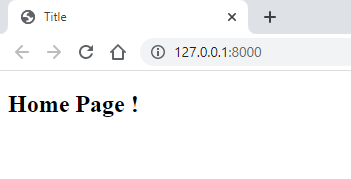
Now by typing the url address: http://127.0.0.1:8000/ we get the start page:
4 - Creating a CRUD system using django generic views
4.1 - List and display Students data
So far, we have only seen displaying static pages with
. While it's handy, there's nothing very powerful so far. Now let's talk about something more interesting: a trick that displays the list of students and when you click on any student you are redirected to a page that displays the details of this student. We have already done something similar in previous tutorials but it was in a homemade way. Today we will try to achieve the same task, but in a more modern way using django's generic views based on the ListView and DetailView classes. Like TemplateView, we can use ListView directly by passing it the model to process as a parameter as we can do it in the views:
1 - To display the students list we use in the views:
#studentApp/views.py

class StudentList(ListView):
    model = Student
2 - To see the student details, we use in the views:
#studentApp/views.py
class StudentDetail(DetailView):
    model = Student
3 - In the urls file we use:
# studentApp/urls.py
urlpatterns = [
    path('', StudentList.as_view(), name='student_list'),  # url http://127.0.0.1:8000/student
    path('view/<int:pk>', StudentDetail.as_view(), name='student_detail'),
]
Remark
With this method, Django enforces a few conventions: The template should be called
, and will contain all students data. It is possible to redefine these values by passing additional arguments to our
:
class StudentList(ListView):
    model = Student
    template_name = 'our_template.html'
4 .2 - Create, update & delete data
Create, Update & Delete operations are performed using the
,
&
classes, so all you have to do is create classes that inherit from them and associate them with the appropriate urls:
# studentApp/views
class StudentCreate(CreateView):
    model = Student
    # Field must be same as the model attribute
    fields = ['name', 'email', 'phone', 'section' , 'photo']
    success_url = reverse_lazy('student_list')

class StudentUpdate(UpdateView):
    model = Student
    # Field must be same as the model attribute
    fields = ['name', 'email', 'phone', 'section' , 'photo']
    success_url = reverse_lazy('student_list')

class StudentDelete(DeleteView):
    model = Student
    success_url = reverse_lazy('student_list')
And at the url level, just use the classes created within the views and apply them the as_view() method:
# studentApp/urls.py
urlpatterns = [
    path('new', StudentCreate.as_view(), name='student_new'), # url http://127.0.0.1:8000/student/new
    path('edit/<int:pk>', StudentUpdate.as_view(), name='student_edit'),
    path('delete/<int:pk>', StudentDelete.as_view(), name='student_delete'),
]
5 - Full Code of the CRUD application
5.1 - Coding of views studentApp/views.py
# studentApp/views.py
from django.views.generic import ListView, DetailView, TemplateView
from django.views.generic.edit import CreateView, UpdateView, DeleteView
from django.urls import reverse_lazy
from studentApp.models import Student

class StudentList(ListView):
    model = Student

class StudentDetail(DetailView):
    model = Student

class StudentCreate(CreateView):
    model = Student
    # Field must be same as the model attribute
    fields = ['name', 'email', 'phone', 'section' , 'photo']
    success_url = reverse_lazy('student_list')

class StudentUpdate(UpdateView):
    model = Student
    # Field must be same as the model attribute
    fields = ['name', 'email', 'phone', 'section' , 'photo']
    success_url = reverse_lazy('student_list')

class StudentDelete(DeleteView):
    model = Student
    success_url = reverse_lazy('student_list')
5.2 - Coding of urls
# studentApp/urls.py
from django.urls import path
from .views import *

urlpatterns = [
    path('', StudentList.as_view(), name='student_list'), # url http://127.0.0.1:8000/student
    path('view/<int:pk>', StudentDetail.as_view(), name='student_detail'),
    path('new', StudentCreate.as_view(), name='student_new'), # url http://127.0.0.1:8000/student/new
    path('edit/<int:pk>', StudentUpdate.as_view(), name='student_edit'),
    path('delete/<int:pk>', StudentDelete.as_view(), name='student_delete'),
]
5.3 - Display Data within the template
5.3.1 Display the students list: http://127.0.0.1:8000/student/
Template accessible via the url address: http://127.0.0.1:8000/student/
<!-- templates/studentApp/student_list.html -->
<h1>Student List</h1>
<a href="{% url 'student_new' %}">Create New Student</a><br><br>

<table >
<thead>
    <tr>
        <th>Name</th> <th>Email</th> <th>Phone</th> <th>Section</th> <th>Photo</th>
        <th>Details</th> <th>Update</th> <th>Delete</th>
    </tr>
    </thead>
    {% for student in object_list %}
    <tr>
        <td>{{ student.name }}</td>
        <td>{{ student.email }}</td>
        <td>{{ student.phone }}</td>
        <td>{{ student.section }}</td>
        <td><img src="/media/{{ student.photo }}" width="65" height = "75"/></td>
        <td> <a class="btn btn-info" href="{% url 'student_detail' student.id %}">Detail</a></td>
        <td><a class="btn btn-primary" href="{% url 'student_edit' student.id %}">Edit</a></td>
        <td><a class="btn btn-danger"  href="{% url 'student_delete' student.id %}">Delete</a></td>
    </tr>
    {% empty %}
    <tr><td colspan="3"><b>Data is empty! Please, add data first.</b></td></tr>
    {% endfor %}
</table>
5.3.2 - Display student details
<!-- templates/studentApp/student_detail.html -->
<!DOCTYPE html>
<html lang="en">
<head>
    <meta charset="UTF-8">
    <title>Title</title>
</head>
<body>
<h1>Student Detail</h1>
<h3>Name : {{ object.name }}</h3>
<h3>Email : {{ object.email }}</h3>
<h3>Phone : {{ object.phone }}</h3>
<h3>Section : {{ object.section }}</h3>
<h3>photo : <img src="/media/{{ object.photo }}" width='100' height='100' /></h3>
</body>
</html>
5.3.3 Add & Edit student data
Adding data and updating data are two operations necessary for setting up a CRUD system. but what is majic here is that these two operations share the same form via the template
<!--  templates/studentApp/student_form.html   -->
<!DOCTYPE html>
<html lang="en">
<head>
    <meta charset="UTF-8">
    <title>Title</title>
</head>
<body>
<h1>Student Form</h1>
<form enctype="multipart/form-data" method="POST">
    {% csrf_token %}
    <table>
        <tr>
            <td>Name</td>
            <td>:</td>
            <td>{{ form.name }}</td>
        </tr>
        <tr>
            <td>Email</td>
            <td>:</td>
            <td>{{ form.email }}</td>
        </tr>
        <tr>
            <td>phone</td>
            <td>:</td>
            <td>{{ form.phone }}</td>
        </tr>
        <tr>
            <td>Section</td>
            <td>:</td>
            <td>{{ form.section }}</td>
        </tr>

        <tr>
            <td>Photo</td>
            <td>:</td>
            <td>{{ form.photo }}</td>
        </tr>

        <tr>
            <td><input type="submit" value="Save"></td>
        </tr>
    </table>
</form>
</body>
</html>
5.3.4 - Data deletion with confirmation
To delete data with a confirmation alert, the DeleteView class uses by default a template named
in our case the data deletion template will be called:
:
<!--  studentApp/student_confirm_delete.html  -->
<!DOCTYPE html>
<html lang="en">
<head>
    <meta charset="UTF-8">
    <title>Title</title>
</head>
<body>
<h1>Delete Student</h1>
<form method="post">{% csrf_token %}
    Are you sure you want to delete "{{ object }}" ?
    <input type="submit" value="Submit" />
</form>
</body>
</html>
Younes Derfoufi
my-courses.net